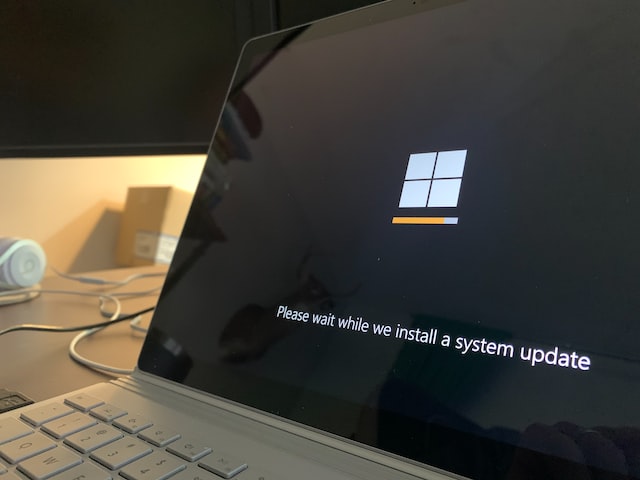
How to disable Windows 10 automatic background update? Many Windows 10 reports that their computer is lagging and when they check system performance they find high RAM and Disk usage.
After searching for a will, they found that this is happening due to the automatic update of Windows 10. Even after some of the latest updates their Operating system sometimes crashes.
So let’s see how you can turn off Windows 10 updates though it is not permanent following these steps will stop automatic updates for a few months.
Turning off Windows 10 updates from Windows Update
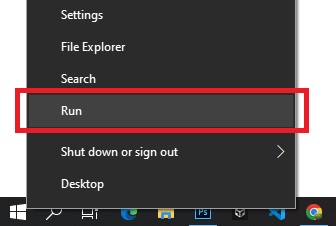
- Right-click the lower left corner to start and click “Run”.
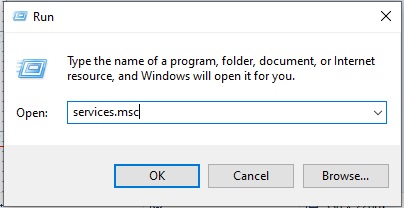
2. Then enter the code “services.msc ” in the input field.
3. Click “Service Local” and find the “windows update” service.
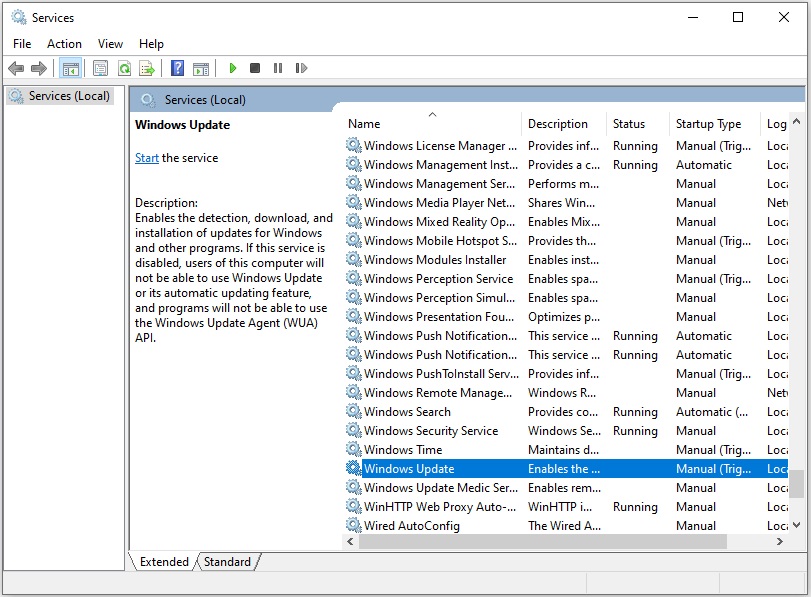
4. After opening the service, enter the general properties, click “Startup type” and select “Disabled”.
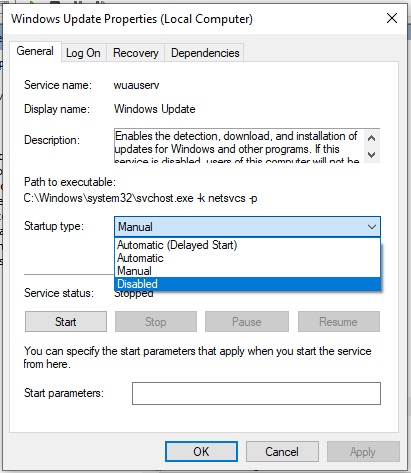
5. After completing all the above steps restart your computer. It’s Done!
Disable Windows 10 update from Setting
If the above step does not work for you then follow the steps below. Another way to stop Windows 10 automatic updates is to turn on the metered connection option from settings.
- Open the start menu and type “Setting“.
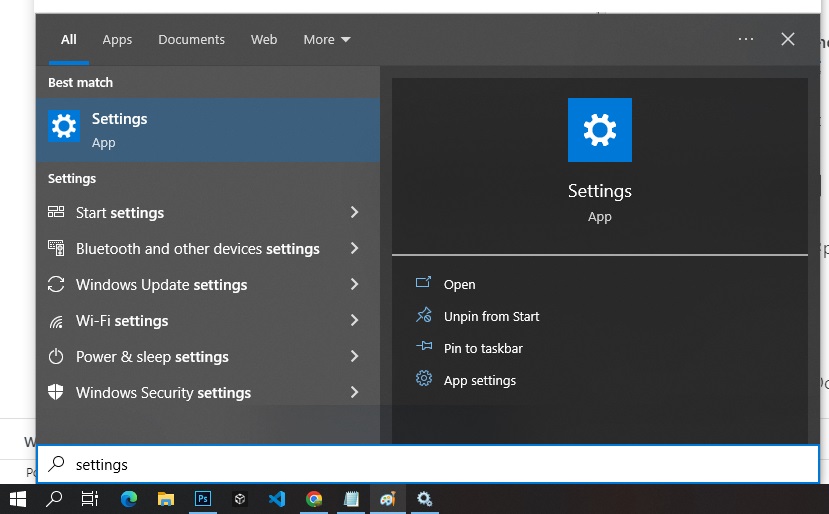
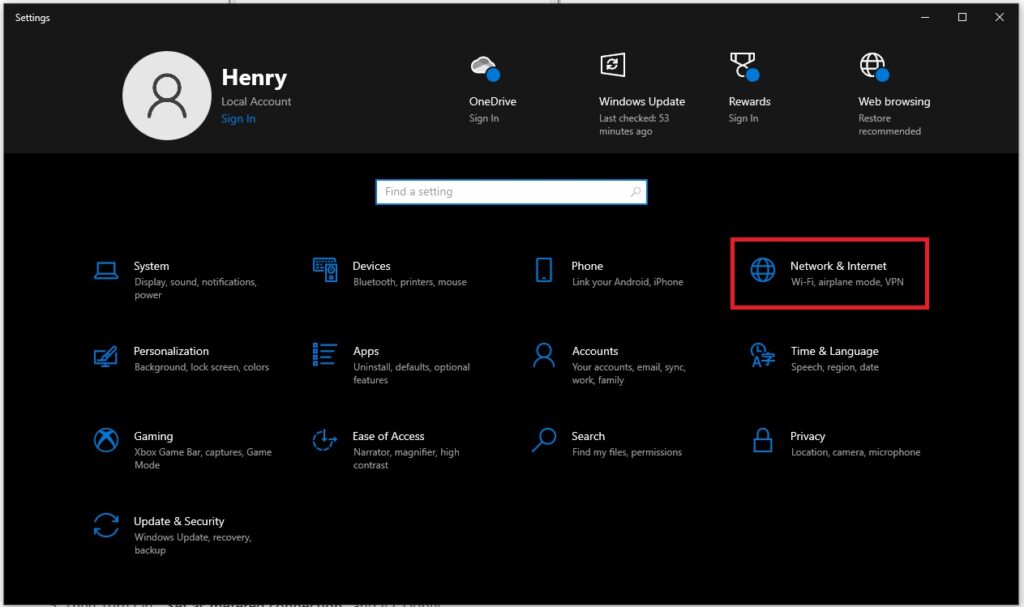
2. After opening “Settings” click on “Network and Internet“.
3. On the left side you will find an option “WIFI“.
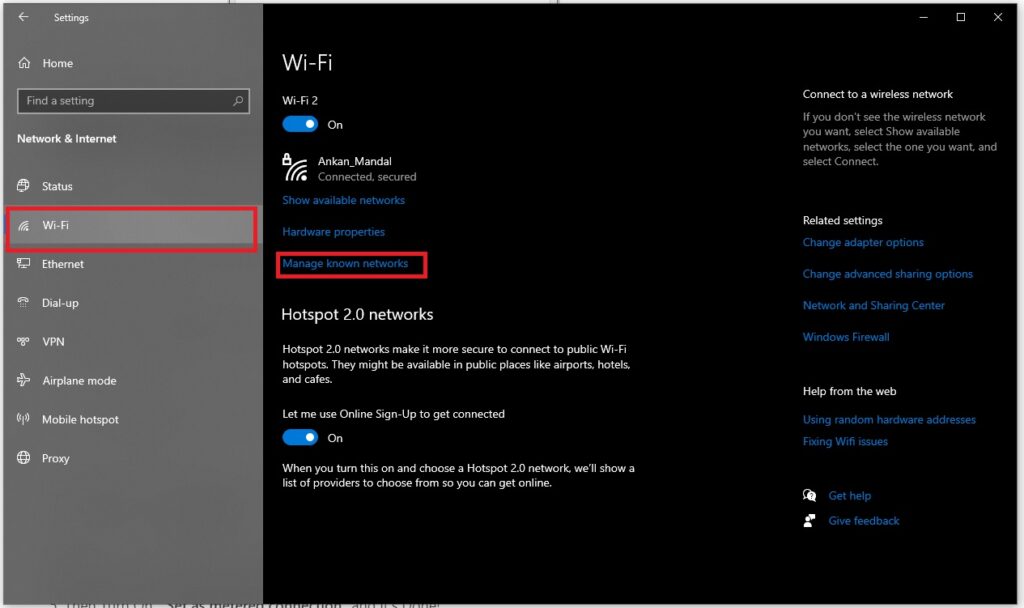
4. After that click on “Manage known networks“. A new page will open then click on the WiFi network you use and click on “Properties“.
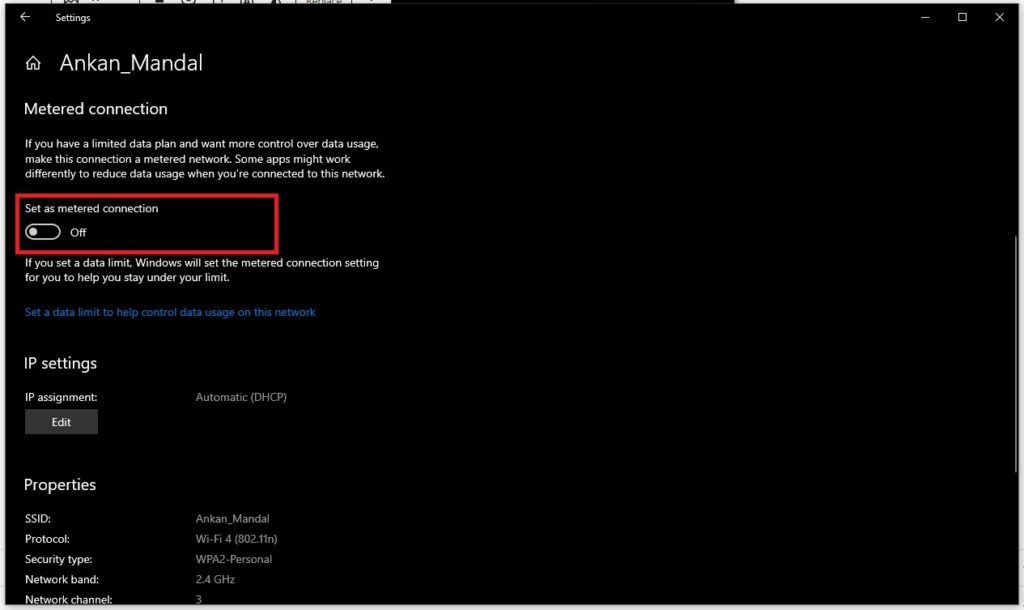
5. Then Turn On “Set as metered connection” and it’s Done!
